
It's an interesting time to make DIY swirly paper flower with available materials all the time and less efforts and easy to make.
DIY Swirly Paper Flowers

To make these beautiful flowers first you have to cut a 2 inches wide strip of colored paper. Fold it lengthwise from one side as shown. After that make cuts in the strip and swirl the fringe. Then cut another 2 inches wide strip of green paper, make a roll with it and glue the ends to become a stem. Apply glue on the swirled strip and start rolling it around the stem. Fold a 2 inches wide strip of green paper and cut it while folded as shown. Unfold the paper and grass will form. Glue and roll that too around the stem.
After a long time I've finally decided to post a paper flower bible as soon as I saw these paper flowers on a facebook page. I wasn't sure what to name this flower, though it looked quite similar to Saccharumspontaneum (kans grass), but as this flower has a lot of swirls I named it 'swirly paper flower'.
They're really easy and fun to make, hope you like him!

To make this flower you'll need:
- Colored paper,
- Customized colored paper,
- Scissor,
- Glue.
Step 2: Preparing Paper Strips


You can use single colored (usual craft paper) papers for making these flowers but I liked using the customized colored papers for making them. You can paint the papers with the colors of your choice and create beautiful shades to make the flowers look prettier.
First, you have to cut the colored paper into strips of at least 2 inches width and length of your choice, I kept the paper strips 2 X 8 inches.
Make a thin fold along any one of the vertical edges (of the strips).
Step 3: Cutting Fringes


You can fold the paper strip into half to save your time cutting fringes on it,
Cut the paper strip horizontally, but not all the way through. Leave 1 cm of the strip along the vertical edges, or more clearly leave the thin folded area (the vertical fold made in step 1) intact.
Try to cut all the fringes equally, no pressure, I'm sure you can do it,
Also try to keep the fringes as thin as possible, the thinner the fringes the prettier the flower :)
Step 4: Making Swirls


Now that you're done cutting fringes along the vertical edges it's time to roll the thin strips (fringes) into swirly patterns.
Start rolling each strip from its end and all the way through the other end, which means use the whole strip (fringe) to make a swirly pattern.
This is the only step which takes time but it's the most important step.
Roll each strip one by one and make sure the swirls turn out fine.
Take your time and make the swirls carefully, I'm telling you it's worth it :)
Step 5: Making the Stem


Before making the flower you'll have to make a stem for the flower.
Use green paper for making the stem.
Cut a long strip (2 X 10 inches) of green craft paper, start rolling the paper diagonally from any one end (corner) and keep rolling the paper till you reach the other end.
Apply a small amount of glue on both ends of the rolled paper to make sure the roll is secure.
Step 6: Making the Flower)


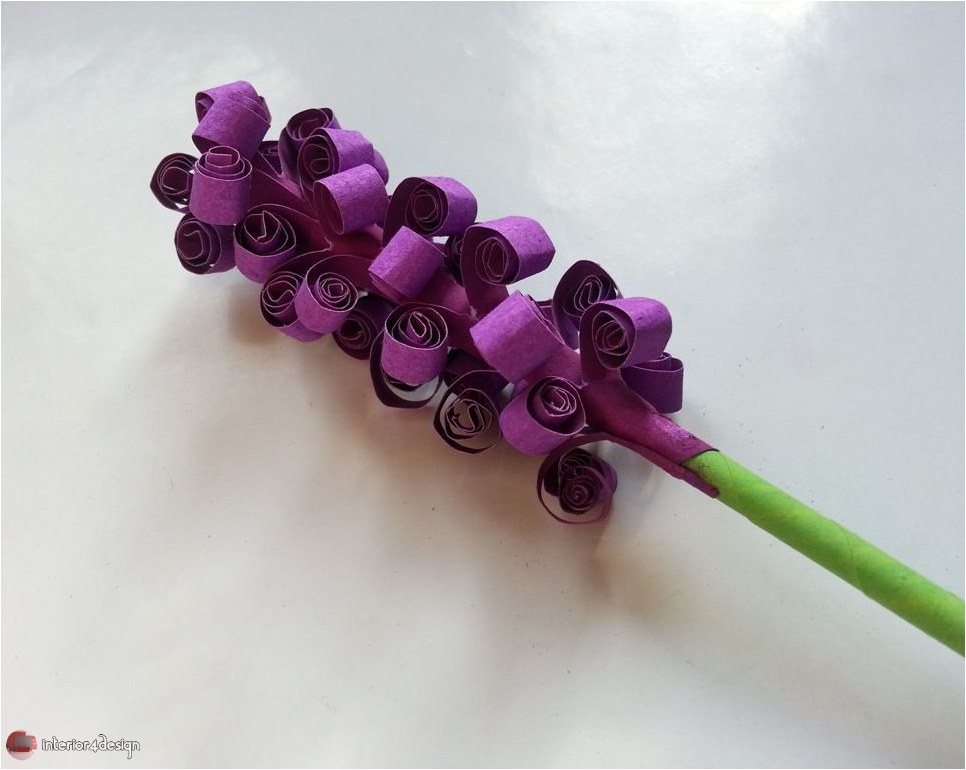
Take the swirly-fringed paper and apply glue along the intact part of the swirly-fringed paper- see the first picture of this step to be more clear about on which part to apply the glue.
Wrap the glued area of the swirly-fringed paper on the green rolled paper (stem),
Start gluing it from the top of the stem carefully rolling it towards the bottom of the stem. Keep rolling (and gluing) until the swirly paper ends.
You'll be happy to see how pretty the flower turns out!
Step 7: Adding Leaves


Use green craft papers for making the leaves.
Cut a small piece ( 2 X 3 inches) green paper,
Fold the paper in 1 cm accordion fold,
Cut any one side into a pointy shape,
Unfold the paper and glue it around the stem, below the paper flower.
Done! Make as many as you want (or can!), use different beautiful colors. Paper crafts are always amazing and this was a fun one! You can also find a video tutorial of making this flower by deba, click here to find out.
Enjoy!
13 People Made DIY Swirly Paper Flowers Project!


Architecture & Design: DIY Swirly Paper Flowers
So we have finished writing the post DIY Swirly Paper Flowers and wish to offer you the interior designs so that you can share with friends and relatives on Facebook Twitter and Google Plus and other social networks and digital networks, also you can send comments through the box below to express your opinion on the article, so you could send suggestions and preferences to take into consideration for editing and adding, a bouquet of love appreciation and respect sent to you through Interior4Design platform.
sourec: instructables.com/id/Swirly-Paper-Flowers/