Original decorations often come at a high price; especially inspiring pieces of art. But who says you can’t make your own art decoration?
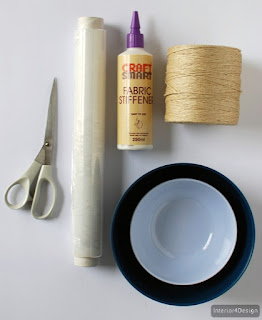
With the help of this tutorial, you will be able to make a sculptural string bowl overnight. This is the perfect DIY project that will yield you a hand-crafted delight of a home. You won’t want to stop at just one bowl, and might wonder if you’d like to make a set of three various size bowls in order to make the most beautiful display. Before you get to that question, you must first have these items:
Supplies
• a ball of string
• a cling film
• a pair of scissors
• a small bowl for fabric stiffener
• 250ml bottle of fabric stiffener
• a large bowl to use as a mould
Start by preparing the materials. You do this by taking the cling film and covering the outside and inside of the large bowl. Take the smaller bowl and pour some fabric stiffener into it. For the next few minutes, you have to work with the ball of string. Use the pair of scissors to cut a dozen 42inch/110cm pieces of string and form a neat roll by winding them around your fingers…the next steps
Step 1: Prepare the Materials
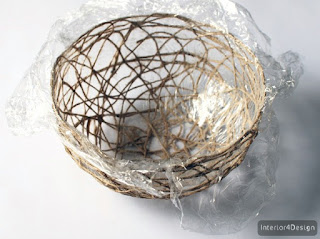
Cover the outside of your bowl with cling film, making sure the ends of the film wrap over into the inside of the bowl.
Cover your work surface.
Pour some fabric stiffener into the other bowl.
Cut 12 lengths of string measuring about 110cm (42 in) each.
Step 2: Soak the String
Wind the lengths of string around your fingers to form a neat roll.
Place the string in the bowl with the fabric stiffener. Push the string down into the fabric stiffener and pour more over the top so the string is covered. Knead the fabric stiffener into the string so it's completely soaked through.
Step 3: Make the String Bowl
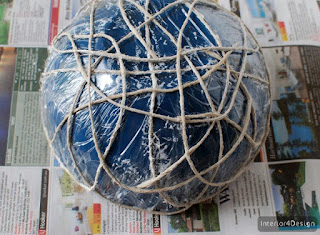
Start wrapping the string randomly around the bowl. For this bowl I wrapped the string over the bowl from one side to the other, rather than around and around. When the string reaches the rim just turn back creating a 'U' turn. Keep adding new pieces of string, making sure the ends of each piece are towards the base of the bowl.
Use eight or nine pieces of string and the bowl should be pretty well covered.
Wrap the remaining three or four pieces of string over the rest, going around and around the bowl in a spiral.
Step 4: Strengthen the Overlaps
Strengthen the overlapping string by dabbing more fabric stiffener on with your finger. There are a lot of overlapping areas, so do it methodically, making sure that the joins are wet with fabric stiffener and the string is pushed together. This step is very important as it ensures that your bowl will stay together.
Step 5: Leave to Dry
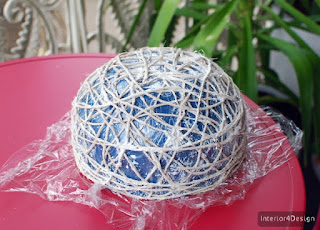
Put the bowl aside to dry - place it outside in the sun if you can. Otherwise, an airy spot in your home near a window will do the job. (If it's particularly cold in your home, a radiator will help aid the drying process.)
Step 6: Consolidate the Mould
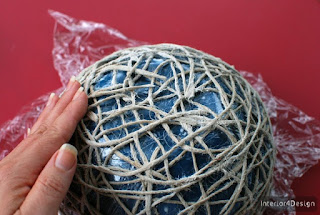
As the bowl starts to dry, press over the entire mould with your fingers and palms periodically. Start doing this when the string has dried out enough so that you don't get fabric stiffener all over your hands when you press on it. As the string dries out you can press harder and the form will become consolidated and strong.
Allow the bowl to dry at least overnight.
Step 7: Remove the Bowl
When the string feels dry, remove the bowl and the cling film. Your string bowl might feel a bit pliable, but it will continue to dry over the next day or so. Make sure you allow it to dry completely before putting anything in it.
Step 8: Clean Up the Fabric Stiffener
With a pair of scissors (or your fingernails), remove any dried pieces of fabric stiffener from between the string. This is slightly fussy and time-consuming but the end result is worth the effort.
Once the bowl is completely dry and hard, it's ready to use.
Fill Your Bowl and Display
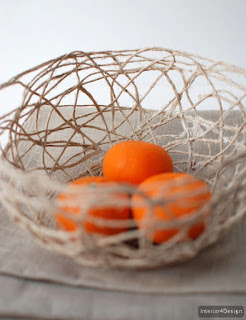
Well done, you've now made a totally unique and beautifully sculptural hand-crafted piece for your home. Fill your bowl with fruit, nuts, pods or even crafty supplies - just make sure not to overload it.
You might like to make a set of three bowls in different sizes for a beautiful tableau display. You could also try experimenting with the way you place your string, or you could also consider dip-dyeing the bottom of the bowls in white paint.
source: tutsplus.com


